Jul 30, 2022
Web Browser Engineering — Part 1
Earlier this month, I started my journey through the fantastic Web Browser Engineering book by Pavel Panchekha and Chris Harrelson. It’s an excellent read explaining the nuts and bolts of how modern web browsers work while walking you through implementing your own “toy browser” from scratch.
Each chapter in the book covers a particular piece of the puzzle, such as building a simple HTTP client, drawing elements to the screen, or parsing HTML into a Document Tree. At the end of every chapter, there is a series of exercises encouraging you to learn more and keep adding features to your browser, which is a fantastic way to deepen your understanding of web fundamentals.
Some of the exercises are straightforward, but more than a few of them had me banging my head against the wall for longer than I’d like to admit. I thought sharing my learnings could be useful for folks in the same boat—or for anyone who is simply curious about what the book is about.
In this post I will cover Part 1, which is is composed of the first three chapters in the book. In particular, I will share my solutions for supporting compressed content, caching, and preformatted text. Just like the book, I’m using Python to implement my browser, but the code examples should be easy to follow in whatever language you choose.
At the end of Part 1, you’ll have a simple HTTP client with a GUI that renders text to the screen. Here’s a screenshot of mine:
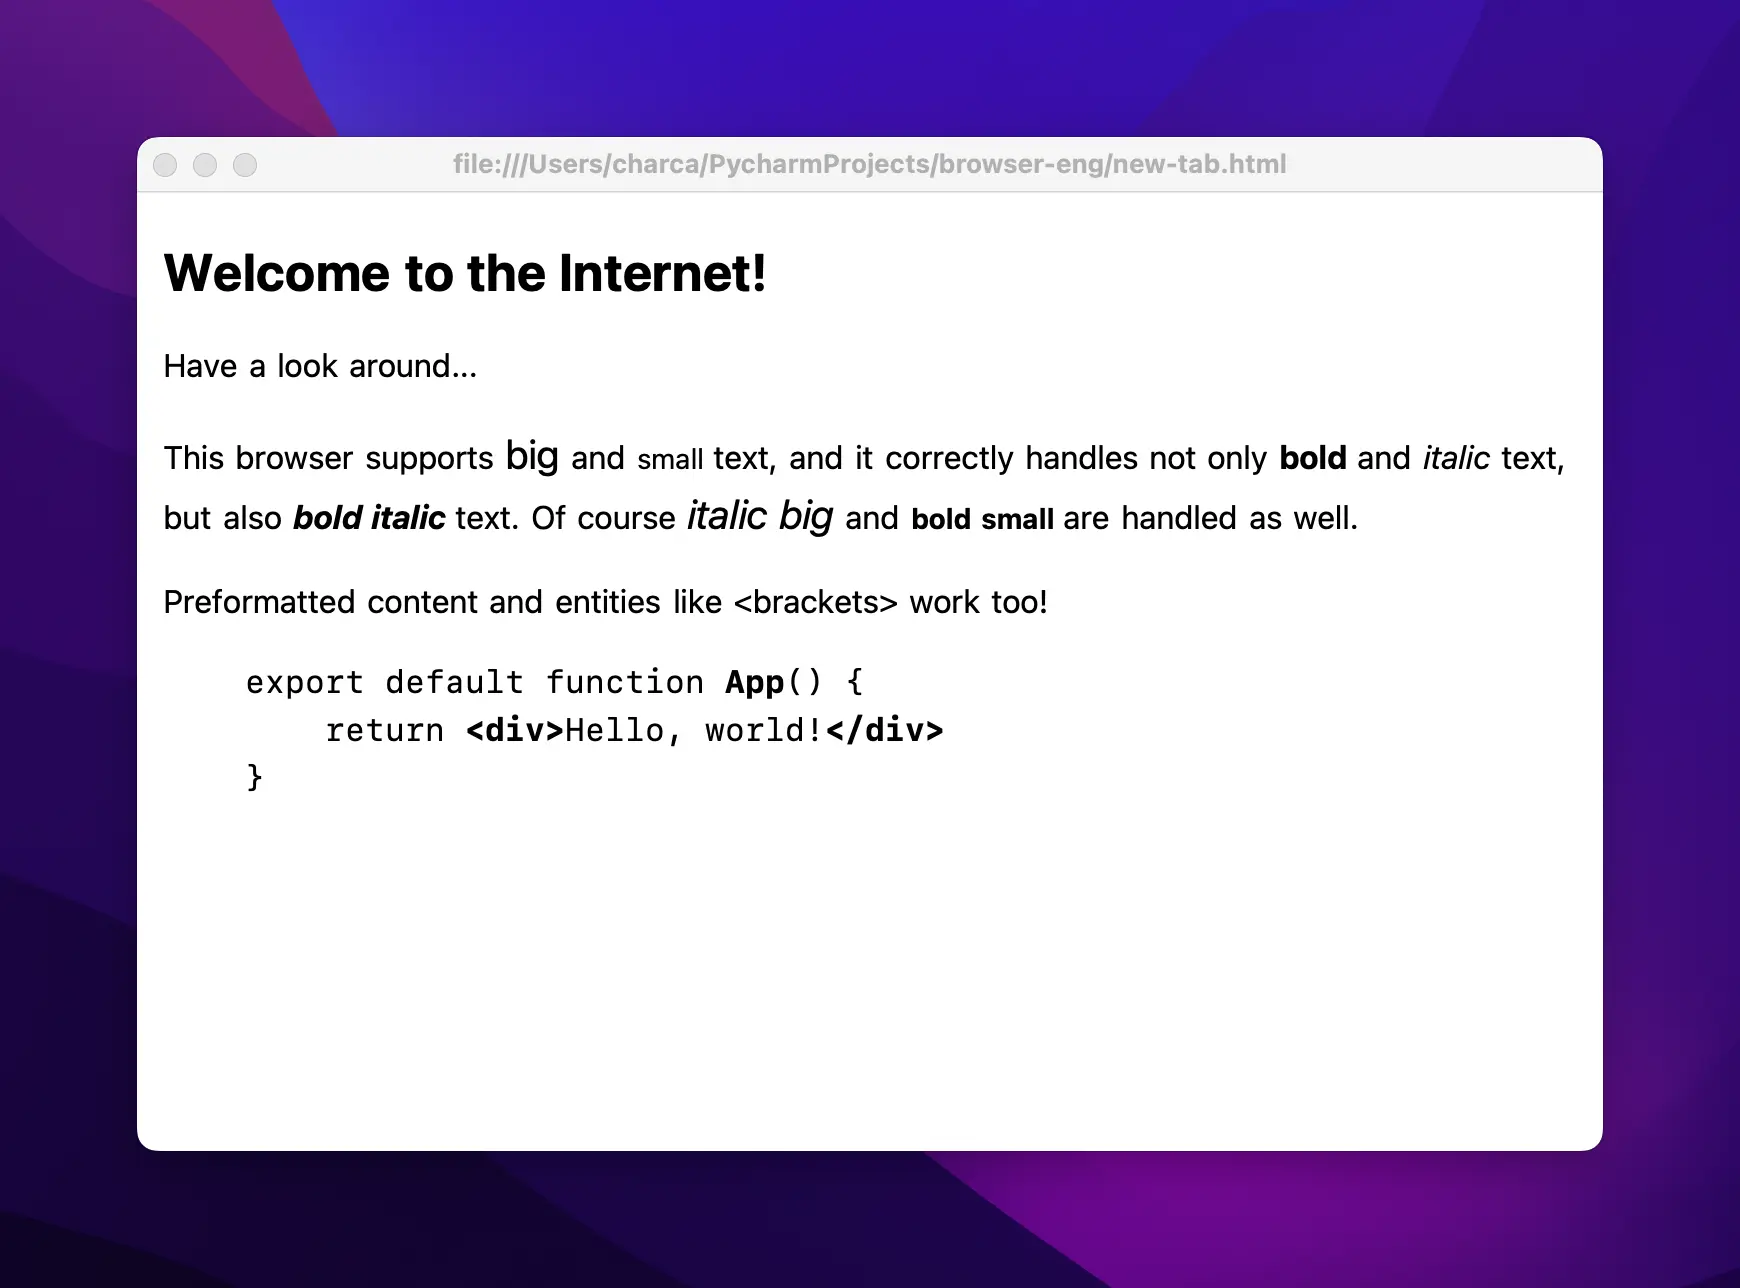
Admittedly, it doesn’t look like much yet—but I think it’s a great start! If you’ve made it this far with your own browser, I hope you’re as proud of your little creation as I am of mine.
Compression
One of the first challenges in the book is to add support for the Content-Encoding: gzip and Transfer-Encoding: chunked HTTP headers. Servers will typically send data that is both gzipped and chunked, so it’s important to support both headers if we want our browser to access most websites.
Content-Encoding: gzip
Servers won’t send us compressed content unless our browser tells them that we can handle it. So the first thing we need to do is instruct servers that our browser supports gzip responses by adding the "Accept-Encoding": "gzip" header to the request.
Once we do that, we need to update the way we read the HTTP response with the socket instance. Previously in the chapter, we used the makefile method to read the response and encode it as the same time:
response = s.makefile("r", encoding="utf8", newline="\r\n")But to support gzipped content, we need to update this call to read the response as bytes rather than utf-8 decoded text:
response = s.makefile("rb", newline="\r\n")Keep in mind that once you do this, you’ll need to decode the text whenever you read from this file-like object:
body = response.read() # This will give you bytes
body = response.read().decode('utf8') # This will give you text
Finally, we need to check for the presence of the content-encoding header, and decompress the response body accordingly:
import zlib

# ...

body = response.read()

if 'content-encoding' in headers and headers['content-encoding'] == 'gzip':
    # The response body is gzipped, decompress it *before* decoding it
    body = zlib.decompressobj(32).decompress(body).decode('utf8')
else:
    body = body.decode('utf8')
In my original implementation, I was using Python’s gzip package to decompress the response body. This worked fine in some cases, but was breaking in others for some reason,
My theory is that this is caused by different servers using different gzip algorithms to compress the response. I couldn’t confirm that’s the reason though, so don’t quote me on that.
so I’ve changed my code to use the zlib package instead, which seems to work fine in all cases.
Transfer-Encoding: chunked
Even though chunked transfer encoding is only available in HTTP/1.1, making our browser support it was a great learning experience. And also required if you want to support gzipped content, since compressed content is often both gzipped and chunked.
With chunked content, instead of getting the response body all at once, we’ll get it as a series of consecutive chunks with the following format:
{chunk_size}\r\n{chunk_size_bytes_of_data}\r\nWe don’t know beforehand how many chunks we’re going to get, so we’ll need to keep reading chunks until we reach a chunk size of 0, which indicates the end of the response.
Here’s an example of a chunked response body (broken down in new lines to make it more readable, but this will typically come in a single line.)
3\r\n            (chunk size = 3)
Wel\r\n
5\r\n            (chunk size = 5)
come\r\n
5\r\n            (chunk size = 5)
to \r\n\r\n
D\r\n            (chunk size = 13)
maxiferreira.\r\n
4\r\n            (chunk size = 4)
com\r\n
0\r\n            (chunk size = 0 -> final chunk)
\r\n
Once we stitch together all the chunks, we’ll get a response body that looks like this:
Welcome to
maxiferreira.com
A couple of gotchas to keep in mind when decoding chunked content:
- The chunk size is a hexadecimal value, so you’ll need to convert it to decimal first. Not that it happened to me,
It definitely happened to me.
but it’s easy to fall into the trap of seeing a chunk size of
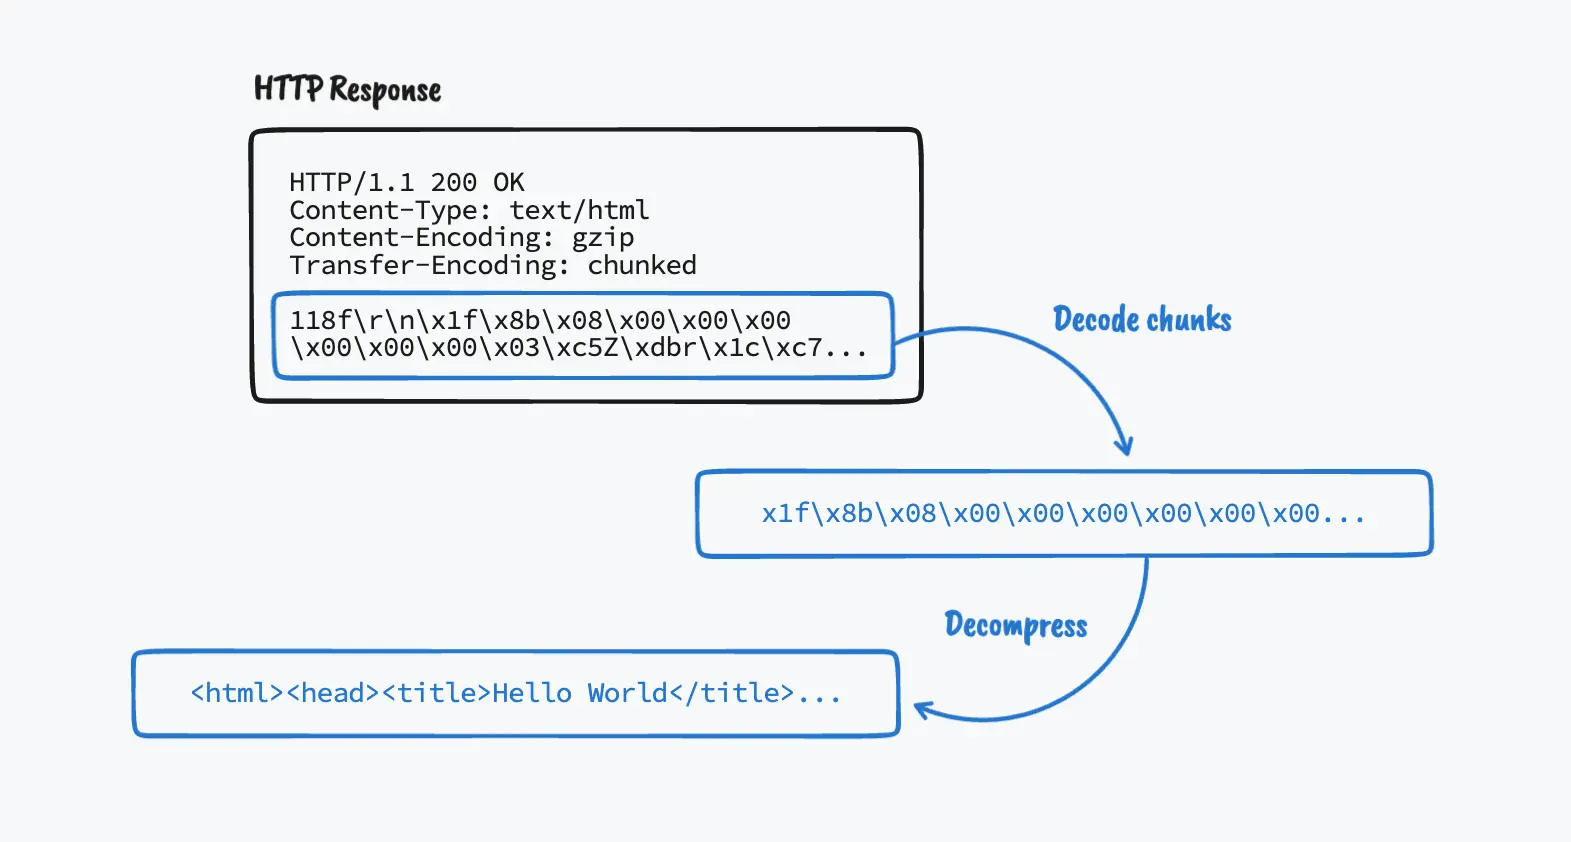
1024and thinking that the next chunk is 1,024 bytes long, when it’s actually 4,132 bytes long. (0x1024 == 4132) - Since responses are typically both chunked and gzipped, you need to make sure that you decode the chunks before decompressing.
Here’s my implementation for the chunk decoding functionality:
# Decode the chunked content
if 'transfer-encoding' in headers and \
        headers['transfer-encoding'] == 'chunked':
    chunks = []

    while True:
        chunk_len = response.readline().decode('utf8')
        chunk_len.replace('\r\n', '')
        chunk_len = int(chunk_len, 16)
        chunk = response.read(chunk_len)
        chunks.append(chunk)
        response.readline()
        if chunk_len == 0:
            break

    body = b''.join(chunks)
else:
    # The rest of the response is the body of the request
    body = response.read()
We start by reading and decoding the first line of the response. This line will contain the chunk size (in hexadecimal) and a CRLF token, which we’ll remove. We’ll convert this to a decimal integer, and then read the number of bytes specified by the chunk size. Then, we’ll add the chunk to a list, and read the rest of the line which should put the cursor right at the beginning of the next chunk.
We’ll keep doing this until you reach the final chunk with length 0. Finally, join the chunks together and voila!, you have your response body (which probably looks like a bunch of garbage at this point because it’s likely gzipped, so remember to decompress it afterward).
Caching
Support for the Cache-Control header can be implemented in many different ways. Originally, I thought about using some sort of document database to store resources, but I ended up using Python’s shelve library to persist a dictionary in disk.
First off, we need to update our request function to check for the presence of a cache-control header with a max-age directive, which is the only one the browser supports at the moment.
In addition to no-store, in which case the browser doesn’t cache the resource at all.
Then we can grab the max-age value with a regular expression, use it to calculate the resource’s expiration time, and save it in the cache object.
In my implementation, I’m doing this at the end of the request function, right before returning the request’s headers and body:
def request(url):

    # ...

    if 'cache-control' in headers:
        match = re.search(r'max-age=\d+', headers['cache-control'])
        if match and 'no-store' not in headers['cache-control']:
            match_group = match.group()
            max_age = match_group.replace('max-age=', '')
            age = headers['age'] if 'age' in headers else 0

            cache.set_resource(full_url, {
                'expires-at': int(time.time()) + int(max_age) - int(age),
                'headers': headers,
                'body': body
            })

    return headers, body
The cache object is an instance of a simple Cache class that I created to manage the browser’s storage. It’s essentially a fancy dictionary to save cached resources, using the URL as the key and a dictionary containing the headers, body, and an expires-at timestamp as the value. The expires-at value is calculated using the current time, plus the value of max-age, minus the value of the Age header, which tell us how many seconds that resource has been cached in a shared cache (so it should be subtracted from max-age).
Here’s the entirety of the Cache class:
import shelve
import time


class Cache:
    def __init__(self):
        self.__db = shelve.open('cache')

    @staticmethod
    def is_resource_fresh(resource):
        return 'expires-at' in resource and \
               resource['expires-at'] > time.time()

    def get_resource(self, url):
        return self.__db[url] if url in self.__db else None

    def set_resource(self, url, resource):
        self.__db[url] = resource

    def delete_resource(self, url):
        del self.__db[url]
As mentioned above, it uses Python’s shelve library to persist the cache in a .db file in disk, which, for a web browser, seemed more useful than an in-memory cache. The beauty of this method is that the shelve library is a drop-in replacement for a regular dictionary. If you don’t want a persistent cache, all you have to do is change the constructor to:
def __init__(self):
    self.__db = {}
Finally, check for the existence of a cached resource right at the beginning of the request function and return the cached content if it’s still fresh:
def request(url):

    cache = Cache()
    cached_resource = cache.get_resource(url)

    if cached_resource:
        if cache.is_resource_fresh(cached_resource):
            # Resource is fresh, return from cache
            return cached_resource['headers'], cached_resource['body']
        else:
            # Resource is stale, delete from cache
            cache.delete_resource(url)
    # ...
The best way to test if your cache is working is to spin up a local server and hard-code the response headers. Here’s an example Express server you can use:
const express = require('express')
const app = express()
const port = 3000

app.get('/', (req, res) => {
  res.set('Cache-control', 'public, max-age=30')
  res.set('Age', '15')
  res.send(`
    <html>
      <body>Hello World!</body>
    </html>
  `)
})

app.listen(port, () => {
  console.log(`Example app listening on port ${port}`)
})
Play with the max-age and Age values and make a few requests to confirm that your cache is working correctly.
Out of scope: cache revalidation
Deleting a resource from the cache when it becomes stale is not what we’re supposed to do. A real browser performs a revalidation request at this point, which still causes a network request, but prevents downloading the resource if the server confirms that the cached stale version is up to date. For this, we would need to support the ETag response header and the If-None-Match request header. I didn’t get that far in my implementation, but I think this is a good exercise if you want to try it! Also, supporting revalidation will give you what you need to support the no-cache directive as well.
Preformatted Text
In Chapter 3, we need to add support for the <pre> HTML tag. The challenge with this is that the Layout.text method splits a token’s text using tok.text.split(), which removes all whitespace and new line characters from the string. This is typically not a problem, but when rendering text inside of a pre tag, we need to find a way to respect those characters.
Using the same method the book uses to handle tag-specific logic, I’m setting a flag to determine whether or not we’re inside of a pre tag. And to make the text look nicer, I’ve also added a new family attribute that changes the tag’s default font to SF Mono.
def token(self, tok):
    # ...
    elif tok.tag == "pre":
        self.family = "SF Mono"
        self.is_pre_tag = True
    elif tok.tag == "/pre":
        self.family = "San Francisco"
        self.is_pre_tag = False
    # ...
Then, in the text method, we will handle tokens inside of a pre tag differently. Instead of splitting the string by whitespace, we will loop through the text one character at a time and construct the list of words manually (including whitespace and new line characters). The complete text method will look something like this:
def text(self, tok):
    font = get_font(
        family=self.family,
        size=self.size,
        weight=self.weight,
        slant=self.style,
    )

    words = []

    # Inside of a <pre> tag we can't simply .split() the text
    # because that would get rid of all whitespace and line-breaks, so
    # we construct the list of words by looping through the text
    # character-by-character. This way, whitespace and new line characters
    # are also added to the words list.
    if not self.is_pre_tag:
        words = tok.text.split()
    else:
        word = ''
        for c in tok.text:
            if c == ' ' or c == '\n':
                if word:
                    words.append(word)
                word = ''
                words.append(c)
            else:
                word += c
        if word:
            words.append(word)

    for word in words:
        w = font.measure(word)

        # When we run out of horizontal space or when we encounter a
        # new line character in a <pre> tag, flush the current line.
        if self.cursor_x + w > self.window_width - HSTEP or \
                (self.is_pre_tag and word == '\n'):
            self.flush()

        self.line.append((self.cursor_x, word, font))

        # Adjust the cursor_x for the next word.
        # Inside of a <pre> character, spaces are words too, so we
        # don't need to leave the extra space character room there.
        self.cursor_x += w
        if not self.is_pre_tag:
            self.cursor_x += font.measure(' ')
One thing to keep in mind here is that new line characters (\n) within a pre tag need to flush the current line’s buffer just like when we run out of horizontal space.
Conclusion
If you’re curious about how web browsers work internally, or simply want to level up your knowledge of web fundamentals, I cannot recommend Web Browser Engineering enough. Implementing the browser as you read through the chapters is definitely a time investment (especially if you complete the exercises as well), but in my experience, it is absolutely worth it.
If you’re working through the book as well and also found some of the exercises challenging, I hope this post provided some help. If you have any comments or feedback, Or if you simply want to point out how bad my Python is. please reach out! All I know about the way I’ve implemented things is that it works, but I’m sure there are better or different ways to go about it.
Happy coding, and see you in Part 2!